My goal for the rest of this year is to try to post one repeating wreath decoration a month, with a final reveal in December. Some of the wreath motifs will be new to my blog, while others will be an updated version of one of my more popular craft tutorials. Hopefully, by the end of 2022, I will have made a completely joyful and fabulous wreath to hang on my craft room door to brighten everyone’s morning.
---
Back in 2012, I became slightly obsessed with the idea of making a felt ball rug. I'd never seen one before, and I was immediately drawn to its pixelated quality, with its explosion of joyful colour.
At the time, it was quite difficult, and extremely expensive to purchase that many felt balls, so I set about trying to find a quick (and less back-breaking) method of making them myself - aside from wet or needle felting them.
I began by knitting beads, stuffing them with wool, and then felting them in the washing machine. I then used a hand mixer to make them slightly fuzzier. Unfortunately, I couldn't quite remove the stitch definition and so I tried something different...
For my second attempt at making felt balls I simply wound my loosely spun merino yarn into little balls, threaded the end through a needle, stitched through them a few times to secure the end, and popped them in the washing machine on several hot washes.
This later method was a lot more efficient than the earlier method, but after calculating that I would need about 5000 felt beads to make a rug in the dimensions I wanted, I quickly shelved this project under the heading of "Too hard" and moved on...
This time, however, I'm going to be making felt beads for a much more manageable project - as pops of colour on my Joyful Wreath.
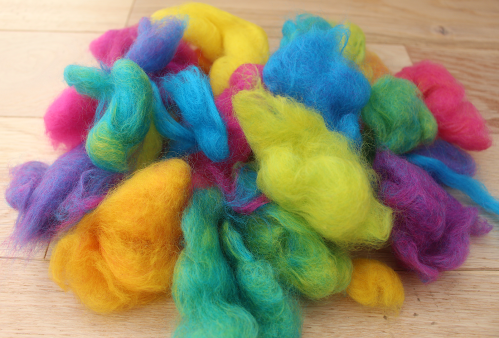
Combing waste is ideal for making felt balls as the fibres are quite short and relatively matted, and the fibres aren't really suited to the worsted style yarns that I prefer to spin. There's also something extremely satisfying about making lots of cute, multicoloured balls out of something that might otherwise be thrown away.
Materials used to make needle felted wool balls or beads.
This blog post contains Amazon affiliate links to similar products that I purchased myself to make the Needle Felted Flowers. If you click through and purchase, I will receive a small percentage of the purchase price at no extra cost to you.
- Needle felting needles. I use just 4 needles to make the felted balls - a single regular size 36 (coarser) needle and 3 x size 42 (finer) needles held together.
- Jeweller's scales that are accurate to 2 decimal places - these are quite optional, but as the bundle of wool fibres shrink down so much, I find it much easier to weigh out the clumps of wool rather than try to eyeball them.
- Any wool fibres that felt.
- Finger protectors - again, these are optional but I like to use them when working so close to my fingers. Those needle felting needles are sharp! I’ve tried both the leather and silicone finger protectors and I find the leather ones offer quite a bit more protection, but the silicone ones are a slightly more comfortable fit.
I begin my weighing out my fibre. I normally aim for between 0.35g and 0.45g for a 1.5 - 2cm ball but nothing about needle felting is an exact science. Some of my balls turned out smaller and denser, while others were bigger and squishier.
With a single size 36 needle, start poking your little mound of wool firmly. The needle will enter the wool mound very easily in the beginning so you want to make sure that you are angling the needle down towards the felting mat and not in the direction of your fingers.
Keep prodding the wool firmly, rotating it a little after every couple of pokes.
After a couple of minutes of poking and gently rotating so that wool ball has been evenly stabbed all over, you will begin to feel resistance from the needle felting needle as the wool mound becomes smaller and denser.
At this point, I switch to using 3 x finer, size 42 needles held together.
Felting a ball is one of the easiest needle-felted shapes to begin with as there is really only one thing to remember - if it sticks out, poke it!
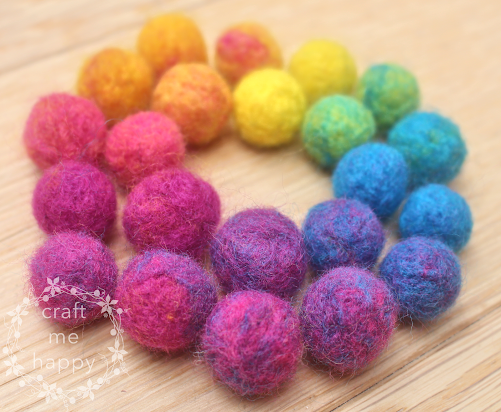
Here's almost a spectrum of wool beads ready to be sewn onto my wreath.
I still have lots of wool combing waste left over so I'll probably just keep adding to my little pile over the next few months...
If you've found this tutorial interesting or useful, please pin it to Pinterest. It makes a big difference to me and helps other crafters find it too.
 |
| Rainbow Decoration Knitting Pattern |
----------
Please be sweet and share the love. Leave a comment, subscribe to my YouTube channel, like my Facebook page for regular updates or follow me on Pinterest, Bloglovin' or Instagram


No comments:
Post a Comment